Introduction to Modified Baby Constraint Induced Movement Therapy (Baby-CIMT)
Acknowledgements:
This website was made possible through the collaborative efforts of healthcare practitioners and researchers across Canada:
- Sophie Lam-Damji, Liz Cambridge, Bisman Mangat, Darcy Fehlings, Lauren Switzer (Holland Bloorview Kids Rehabilitation Hospital)
- Christine Marchessault, Scott Thieu (IWK Health)
- Catherine Scott (Janeway Children’s Rehabilitation Centre)
- Melissa Myers (Queen Elizabeth Hospital)
- Giannoula Mentakis (Montreal Children’s Hospital)
- Melanie Gagnon (CHU Sainte-Justine)
- Paige Kirby (Rehabilitation Centre for Children)
- Charlotte Henderson (Saskatchewan Health Authority)
- Kathleen O’Grady (Glenrose Rehabilitation Hospital)
- Keith O’Connor (BC Children’s Hospital)
Modified Baby Constraint Induced Movement Therapy (Baby-CIMT) is a proven, safe, and effective early motor-based intervention for infants as young as 3 months of age. Throughout the handbook, modified Baby-CIMT will be referred to as Baby-CIMT.
Baby-CIMT is recommended for infants with an early hand preference, or infants who have a diagnosis or probability of hemiplegic cerebral palsy (HCP). Infants with HCP have a preference to use one arm/hand more than the other arm/hand. The goal of Baby-CIMT is to improve self-initiated active movement in the helper hand (less-used hand) for the purpose of developing helper hand skills for using two hands together.
Baby-CIMT programs involve blocking the infant's dominant hand for short periods during the day and involves coaching parents on how to use toys and play situations to provide intensive, repetitive, systematic, and progressive motor practice. Evidence from controlled clinical trials has shown that Baby-CIMT provided in the first two years of life improves arm/hand function. Starting this program early provides more opportunities for infants to learn to use their helper hand when the brain is reorganizing motor pathways.
A hybrid, modified approach pairing Baby-CIMT with opportunities to use two hands together to play with toys will help infants to learn to integrate the unilateral helper hand skills learned. This handbook focuses on how to implement Baby-CIMT including toy and play ideas to develop a customized Baby-CIMT program. For two-handed play, try common toys that require symmetrical movements; such as, banging cymbals and shaking maracas. Additionally, to encourage complex skills with both hands, give toys that require the helper hand to hold and grasp the toy while the other hand pinches, pokes, pulls, and manipulates the toy; such as, toys with moving parts or hiding toys inside another object/toy. This will encourage complex, two-handed skills, including turning, rotating, twisting, and grasping/regrasping with both hands (see Appendix A- Example of a Baby-CIMT Program).
The first year of life is a critical period for brain reorganization. Starting Baby-CIMT early in the first year of life can increase arm/hand function in the helper hand.
Baby-CIMT is a parent/caregiver mediated play program for infants 3 months to 2 years of age. Baby-CIMT can be done for short periods of time during the day over several weeks in the infant's daily environment(s) (e.g., home, daycare).
Baby-CIMT is typically done by parents/caregivers in the infant's natural environments, such as at home. The clinical team (e.g., OT, PT, and/or early interventionist) coaches caregivers/parents on how to implement Baby-CIMT to suit their infant's developing needs.
- Play with the toy yourself before offering it to the infant so you are familiar with what helper hand skills are needed.
- Present the toy in front of the infant, and on the helper hand side.
- Show the infant how you want them to play with the toy.
- Provide minimal assistance, if needed, for infant to initially learn how to play with the toy. Withdraw the assistance as soon as the infant demonstrates the ability to play with the toy.
- Give one toy at a time, remove each toy before introducing another toy.
- Wait for the infant to use the helper hand to play with the toy.
- Give positive feedback immediately to encourage the infant to repeat the play (smile, clap, praise).
- If the infant does not play with the toy, change how you present the toy (e.g., give the toy in an easy position) or give a different toy.
- To keep the infant engaged with fresh and novel toys, put together a bin of toys that is only brought out when doing the Baby-CIMT program.
- If the infant is mouthing toys, consider using a pacifier.
Baby-CIMT is a motor-based, early intervention using toys and play to repeatedly encourage infants to use their helper hand. The clinical team educates caregivers/parents, for example, on how to play with their infant to encourage use of the helper hand, considerations for toys, and how to present toys to best encourage helper hand skills. Depending on the infants’ needs and parent/caregiver goals, Baby-CIMT programs will differ between infants. The best Baby-CIMT program is one that is “just right” for the infant. This means a program that is customized to the infant’s needs and optimally encourages repeated use of the helper hand. As such, the implementation, the frequency, and the duration of Baby-CIMT programs will vary. See Appendix A – Example of a Baby-CIMT Program.
For Baby-CIMT, you will need:
- A way to gently block the dominant arm/hand (see Suggestions for Blocking Techniques)
- Safe, age-appropriate toys that will motivate the infant to use the helper hand (see Suggestions to Work on Helper Hand Skills)
- A device to position and support the infant in a safe, seated position. Sitting is the preferred position for Baby-CIMT. If your infant is unable to sit, see Tips for Positioning.
Baby-CIMT programs should be supported by the clinical team. The clinical team will provide ongoing coaching and education to caregivers/parents. In addition, the clinical team will use feedback from caregivers/parents to modify programs as the infant uses the helper hand more.
As a clinician, if parents are actively implementing the program at home and they report the infant is using their helper hand more, this suggests that the program is a “just right” fit.
The clinical team may use a variety of methods for assessing infants to inform the development of a customized, “just right” Baby-CIMT program. These methods may include standardized assessments, clinical observations, review of medical history, caregiver/parent report, and/or review of goals.
If you are using standardized assessments:
Available standardized hand assessments:
- Hand Assessment for Infants (HAI), ages 3-12 months, (Krumlinde-Sundholm, L; Ek, L; Sicola, E; Sjöstrand, L; Guzzetta, A; Sgandurra, G; Cioni, G; Eliasson, AC (2017) Development of the Hand Assessment for Infants: evidence of internal scale validity. Developmental Medicine and Child Neurology. 2017. 59: 1276-1283.
- Mini Assisting Hand Assessment (Mini AHA), ages 8-18 months, (Greaves S, Imms C, Dodd K, Krumlinde-Sundholm L. (2013) Development of the Mini-Assisting Hand Assessment: evidence for content and internal scale validity. Developmental Medicine & Child Neurology 55;11 1030-1037). A screening assessment, the Screen Hand Assessment for Infant (sHAI) is currently available as a quick tool to assess for differences between the hands.
If you are using standardized hand assessments, below is a general guide on how to use the findings from the assessments to develop a customized Baby-CIMT program using the Baby-CIMT - Arm and Hand Adventure: A Tool to Customize Play Activities. This tool helps to generate a list of play activities that match and progress an infant's hand skills. Using the tool, you will be able to select the helper hand skill(s) you would like the infant to work on, the level of difficulty for activities, and the type of toys (commonly found in the home and/or commercially available).
It is important to consider the infant’s developmental readiness and motor skills to match the toy(s) to the infant. You will know you have found the “just right” Baby-CIMT program for the infant if the infant plays with the toy(s) repeatedly using their helper arm/hand. If the toy is too easy or too hard, the infant may not want to play with the toy and not use their helper hand.
HAND ASSESSMENT FOR INFANTS (HAI)
- If the infant always or almost always demonstrates the helper hand skill, select medium to hard activities in the Baby-CIMT - Arm and Hand Adventure tool.
- If the infant sometimes, seldomly, or demonstrates slowness or delay in the helper hand skill, select medium activities in the Baby-CIMT - Arm and Hand Adventure tool.
- If the infant does not demonstrate the helper hand skill, select easy activities in the Baby-CIMT - Arm and Hand Adventure tool.
MINI ASSISTING HAND ASSESSMENT (MINI-AHA):
- If the infant is somewhat effective (i.e., almost good but somewhat awkward with mild asymmetry) in the helper hand skill, select medium to hard activities in the Baby-CIMT - Arm and Hand Adventure tool.
- If the infant is ineffective (i.e., clumsy and with clear asymmetry between the two hands) in the helper hand skill, select easy to medium activities in the Baby-CIMT - Arm and Hand Adventure tool.
- If the infant does not or is unable to use the helper hand skill, select easy activities in the Baby-CIMT - Arm and Hand Adventure tool.
If you are NOT using standardized hand assessments:
If you are not trained on the standardized hand assessments, use the figure below to circle the helper hand skill(s) that the infant can do to determine what skills to start working on. Use the Baby-CIMT - Arm and Hand Adventure Tool to select appropriate activities. For missing skills, select easy tasks. For helper hand skills that are ineffective, slow, and/or clumsy, select medium tasks. For somewhat effective hand skills, select medium to hard tasks.
If the infant is not yet demonstrating any helper hand skills, you can still develop a Baby-CIMT program starting with easy items in the pre-grasp and reaching section (see Figure 1: Pink Section). When the infant is able to successfully perform a helper hand skill approximately 70-75% of the time, consider progressing to the next difficulty level within the helper hand skill.
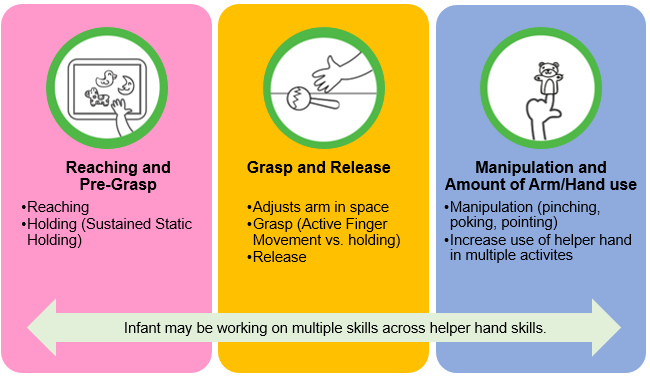
NOTE: Depending on the goals, development, and motor skills, infants may work on skills across coloured sections at the same time. For example, an infant who can manipulate and grasp toys nearby but is unable to reach for toys placed far away could be working on easy tasks within the “pre-grasp and reaching” section and simultaneously working on “refining manipulation”.
It is important to consider the infant's developmental readiness and motor skills to match the toy(s) to the infant. You will know you have found the "just right" Baby-CIMT program for the infant if the infant plays with the toy(s) repeatedly using their helper arm/hand. If the toy is too easy or too hard, the infant may not want to play with the toy and not use their helper hand.
Example (Developmental Level > Arm/Hand Function): An infant whose developmental level is more advanced than arm/hand function.
The infant may be able to reach but not grasp or hold; knows colors and animal shapes.
Tips:
- Choose a toy that is cognitively motivating but requires less motor skill to play with (e.g., sorting animal/color/shapes by reaching to move similar shapes together in a pile).
Example (Arm/Hand Function > Developmental Level): An infant whose arm/hand function is more advanced than developmental level.
The infant may be able to grasp and release, but not yet manipulate toys; difficulty with self-regulation and attending to play and use of helper hand:
Tips:
- Use cause and effect and/or sensory toys (e.g., toys that light-up, vibrate, have textures, have brighter targets) to promote pinching and poking. Sensory toys may be more motivating.
- Limit distraction by removing noise and doing the play session in a less-distracting room to help with focus and attention.
- Show infant how to play with the toy and/or give consistent, simple instructions on how to play with the toy.
- Shorten play session time to match infant’s self regulation.
See Appendix B – Baby-CIMT Essential Elements for Key Elements to Developing a Successful Baby-CIMT Program.
Getting Started: Practical Tips to Implementing Baby-CIMT
Choose a time when the infant can play uninterrupted, such as when the infant is fed, alert, and there are minimal distractions.
Ideally, the infant should be positioned such that the infant is able to see the caregiver/parent’s reaction. This can help to support engagement and repeated play. While the infant can be positioned in different positions, sitting is the preferred position.
Sitting:
|  |  |
|  |  |
Side Lying
|  |
Supine (Infant Lying on their Back)
|  |
Standing
|  |
Equipment Options for Supportive Sitting
| Special Tomato |  |
| Baby Bouncer Chair |  |
| Highchair |  |
| Floor Sitter |  |
What to Use:
| Infant sock, longer fuzzy sock-pair doubled on hand | |
| Infant winter mitten with buckle |  |
| Munch mitt |  |
| Coban wrap | |
| Sleep sack with dominant arm to body | |
| Scarf securing dominant arm to body |  |
| Chip clip at end of the onesie sleeve / tie knot in end of sleeve |  |
| Sew shut opening of sleeve | |
| Snug sock |  |
| Hand splint |  |
When playing with the infant, use toys to encourage the following helper hand skills. The clinical team should coach and educate caregivers/parents on how to do Baby-CIMT and on how to progress the Baby-CIMT program as the infant’s helper hand skills develop. Additionally, the clinical team should inform caregivers/parents on what to look for when playing with their infant and how they will know that they are on the right track.
This handbook lists toys and play activities from “easy” to “hard” and contains tips to guide clinicians on how to progress the Baby-CIMT program. Remember to always work at the infant’s developmental and motor abilities using your assessment findings, clinical observations, caregiver/parental reports, and/or caregiver/parental goals when developing and progressing the program.
Toy and Activity Suggestions
The following play activities can be used to work on multiple helper hand skills. The play activities are progressively graded from "easy" to "hard". Clinicians will need to use clinical judgement on how to present the toy, what toy to use, and how you want the infant to play with the toy to encourage the desired helper hand skill(s).
Clinicians can also use the Baby-CIMT Arm and Hand Adventure: A Tool to Customize Play Activities to generate a custom Baby-CIMT program to work on selected helper hand skills.
When doing the following activities, adult supervision is required for safety. Some activities include small parts and can pose a choking hazard. Parents/caregivers should regularly check toys for safety (e.g., broken pieces).
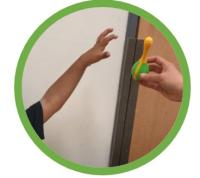
Initiates Use of Helper Hand: Reach and Pre-Grasp

Why work on this skill:
- This skill will help with playing with toys and doing tasks at home and in school.
Tips to progress skill:
- Present toys to infant below shoulder level, initially close to infant on the helper hand side, then in midline, then on the dominant hand side
- Progress to presenting toys further away at shoulder level on the helper hand side, then present in midline, then on the dominant hand side
- Present toys above shoulder level and overhead in front of infant and to the side of the helper arm.
From easier to harder:
- Roll a ball back and forth to tempt infant to reach and push the ball back to you.
- Place a “toy clean-up box” on the helper hand side and have the infant push toys into the box using their helper hand.
- Blow bubbles and catch the bubbles on a wand to encourage the infant to reach to pop the bubbles.
- Tempt the infant to play peek-a-boo by reaching to move your hand/facecloth from hiding your face
- Stick suction cups on the mirror to encourage the infant to grasp or bat at them if grasp is too difficult. Gradually move the suction cups away from the infant (higher, or to the side) to encourage reaching overhead.
- Play with yogurt on a mirror.
- Pull magnets off a sheet pan. Can start on the floor and then place magnets on a wall/fridge.
- Play “Simon Says” game, encourage arm movements overhead.
- Stack and knock-over a block tower.
- Push a ball up a wall using helper arm
- Play tug of war with a towel or blanket.
- Pull pop tube apart with adult holding one side and the infant holding the other.
- Place blanket or hat on the infant’s head, encourage infant to take the object off their head.
Why work on this skill:
- This skill will help with playing with toys and doing tasks at home and in school.
Tips to progress skill:
- Present toys to infant below shoulder level, initially close to infant on helper hand side, then in midline, then on the dominant side.
- Progress to presenting toys further away and at shoulder level on helper hand side, then in midline.
- Present toys above shoulder level and overhead in front of infant and to the side of the helper arm.
From easier to harder:
- Place toys on the floor in the midline to encourage moving the helper arm to bat at / touch toys.
- Play with a toy positioned close to the body on a tray/table top.
- Place pudding on a cookie tray in front of the infant on a surface far enough away to encourage reaching in front.
- Have the infant push a ball, rolling it on a table with a straight elbow.
- Fill a water bottle with toys and food colouring. Have the infant roll the bottle on a flat surface using their helper hand in front of their body.
- Knock down block towers/bowling pins with straight elbow.
- Swipe ribbons and necklaces placed on an upright surface.
- Give high-5’s (elbow straight), play hand games (e.g., pat a cake) far enough away to have a straight elbow.
- Push down toys with resistance.
- Put magnets on a vertical surface.
- Pull suction toys off from a wall placed overhead.
- Grasp and throw various size balls to an adult.
- Reach above shoulder to place balls inside paper rolls taped to the wall.

Why work on this skill:
- This skill will help the infant to use their hand to stabilize toys/objects for the dominant hand to do the task.
Tips to progress skill:
- Give toys that are easy to stabilize by weight, and do not move.
- Give toys that require holding to play with.
- Progress to holding large soft toys to narrower thin toys placed in the hand.
- Consider adding resistance when playing (e.g., tug of war)
From easier to harder:
- Give toys that do not move. Consider cause and effect toys (e.g., toy that lights up, makes sound, vibrates) to encourage the infant to stabilize the toy on a surface by using their hand (hand can be fisted).
- Place the toy in the helper hand to encourage holding; choose a toy that will easily fit in the helper hand.
- Place toys with textures, sound/light in infants hand to encourage sustained holding.
- Place easy to hold item close to infant's hand, physically prompt baby to hold.
- Place larger, lightweight toys for holding (e.g., soft stuffie) in the infant's hand.
- Place narrower thing toys for holding into infant's hand.
- Place toys that change shape, bend, are softer (e.g., small stuffie) in infant's hand.
- Place toys that do not change shape or bend (e.g., block) in infant's hand.
- Give toothbrush holder with toy stuck hiding inside. Infant holds toothbrush holder and adult pulls toy out.
- Give toys that encourage holding and moving of the arm (e.g., rattle, maraca) for shaking.
- Provide resistance while the infant holds and pulls the toy (e.g., tug of war).
- Squeeze squishy toy that makes sounds or lights up.
- Place stamps with larger cylindrical/knob handles in infant's hand and encourage stamping on vertical surface.
Grasp and Release
Why work on this skill:
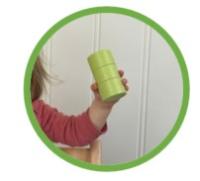
- This skill will help with the ease of moving your forearm which helps with using two hands together later in daily tasks (e.g., feeding yourself, carrying large objects).
Tips to progress skills:
- Start with presenting the toy close to infant with arms resting on surface (e.g., tray of highchair) with elbow bent to make the task easier.
- Gradually move the toy further away to encourage moving the arm with elbow straight.
- Start by grasping toys with palm down and then progress to having the infant grasp toys while moving the arm with thumb pointing to the ceiling.
- Present toys in a vertical position moving towards presenting toys in a diagonal position to encourage arm rotation with grasp.
- Progress to having the infant hold objects that are heavier or harder to hold (palmer vs. pincer grip).
- Encourage the infant to play with toys rotating the arm.
From easier to harder:
- Pat stuffie places on opposite shoulder.
- Tickle the palm/forearm with a feather/toy/towel to encourage infant to rotate forearm to look for source.
- Place a large bright sticker in infant’s palm or on the inner forearm, cue infant to turn palm upwards to see the sticker.
- Hold a rattle and encourage rotating forearm to make sound. Position the rattle initially horizontally then progress to giving rattle vertically.
- Place a board book in front of infant, show infant how to flip each page with their helper hand. Lift the page slightly to help infant get started. You could create a small book with cardboard or diaper wipe containers fastened to cardboard.
- Hold toothbrush holder and adult drops safe snacks into tube and infant can pour the snacks.
- Give a toy, such as a rain stick, in a vertical position. Show infant how to flip it over with helper hand to create the sound. Can make your own by putting rice/lentils into an empty spice container or toilet paper roll and taping the ends.
- Present hand clapper in a vertical position, have infant hold hand clapper and encourage rotating forearm to clap.
- Drumming - have infant hold drumstick and hold a hand drum to the outsider helper hand side. Encourage infant to rotate forearm with palm up to hit drum. Can use household items (e.g., spoon, pot).
- Using a box of tissues or ribbons in an empty tissue box, hold the box upside down and encourage infant to pull out tissues/ribbons with palm facing infant.
- Turn wooden knobbed puzzle pieces, cubes, or baby toy cups over to look at sticker underneath (easier = large knobs using palmer grasp; harder = use pincer grasp).
- Phone toy - have infant grasp phone in horizontal position, then encourage rotating forearm to bring phone to ear.
- Bingo dabber - tape paper onto tray. You can print out a fun design as well.
- Scoop up sand or water and pour it into another container; place the container on the outside of the helper hand side.
- Turn a key in lock - have infant insert a key in a toy lock, then turn the key to open the lock (promoting forearm supination).
Why work on this skill:
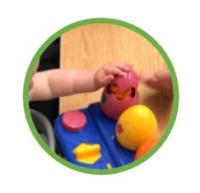
- Adjusting the hand position will help with grasping toys from different positions/surfaces and develops strength to grasp.
Tips to progress skill:
- Present toys from an “easy to grasp” position to “harder to grasp” position. Easy to grasp position is grasping toys from parent/caregiver’s hand then progressing to grasping from a surface.
- Gradually increase the angle from flat surface to vertical surface (e.g., on a wall).
- Give safe, small toys for playing and gradually increase the size of toys (e.g., give a smaller ball and then a medium sized ball).
- Choose “easy to play with/activate” toys using arm and whole hand progressing to toys that require more strength, and combined arm/hand and finger movements.
From easier to harder:
- Fill a Ziplock bag with paint, small toys, glitter and seal tight, have infant smear the paint and play with the toys.
- Place toys on a flat surface, encourage lifting the wrist to activate the toy; such as, tapping a toy piano, playing with a tambourine.
- Fill a water bottle with toys and food colouring, have infant roll the bottle on a flat surface using arm/hand.
- Push a big exercise ball with your hand (hand can be fisted or with an open hand).
- Swipe and/or tap ribbons and necklaces placed on an upright/vertical surface.
- Hit/flick toys on vertical surface using the back of your hand or your fingers.
- Hit a lightweight toy (e.g., balloon, feather) using wrist movement.
- Give high 5's, play hand games (e.g., pat a cake).
- Pull out ribbons, scarves, small toys hidden inside a tissue box (tissue box can be taped to wall).
- Handprints on paper taped to a wall.
- Give push down toys.
- Wipe window dry using a face cloth.
- Put magnets on a vertical surface.
- Grasp and throw various size balls
- Activate a toy that requires strength to spin.
Why work on this skill:
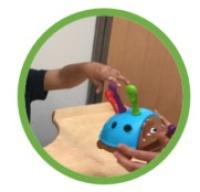
- This skill will help the infant to transfer toys between hands and later use hands together (e.g., grasping and regrasping a piece of paper for cutting).
Tips to progress skill:
- Progress from “easier to grasp” toys to “harder to grasp” toys.
- Give toys closer to infant to grasp and progress to giving toys further away.
- Give toys that encourage give and take games; grasp a toy then give to adult or drop into a basket/bin with larger opening.
- Give toys that need to be inserted into an opening to work on accurate release.
From harder to easier:
- Give toys with sensory features (e.g., spiky ball) to encourage feeling, touching, pinching, opening of hand.
- Give toys that have slots for ease of grasp and release (e.g., oball, slinky).
- Grasp large, lightweight, easy to grasp toys from adult's hand and release them into a box (e.g., bumpy sensory balls that are child size).
- Gift ribbon either held by parent or stuck to surface and infant grasps and regrasps.
- Provide physical prompt to hand to open hand to touch necklace.
- Pull out handkerchiefs from a box with a slot or a whisk and drop into the baset/box.
- Grasp pegs presented in a horizontal position and release onto table.
- Crumple towel/tissue paper placed on a tray/table by grasping and regrasping.
- Pick up wet sponge from a pail/cookie sheet, squeeze water out and drop the sponge and repeat.
- Grasp cubes from adult's hand and release them onto table or basket.
- Grasp irregular shape toys from table and drop them into adult's hand.
- Grasp shapes from adult's hand and place them in a shape sorter.
- Grab magnetic toys off of magnetic board and drop into a container.
- Pick up the peg and place them in the hole.
- Grab coins and place them in coin slot.
- Grab pom-poms and place them in an ice tray or egg carton.
- Grab toys floating in a water bin.
Manipulation
Why work on this skill:
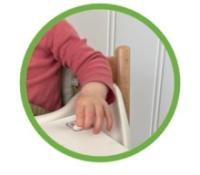
- This skill will help the infant play with various toys of various sizes in different ways. Additionally, this skill will help with turning keys, fastening buttons, holding onto zippers, and holding a pencil.
** Close supervision required as this skill uses small objects**
** These activities are more challenging; be mindful to whether infant is having fun and is engaged.
Tips to progress skill:
- Give larger toys (e.g., 1" block) that can be held using the pointer finger, middle finger, and thumb. Then, give smaller toys (e.g., 1cm block) to encourage the infant to hold with the pointer finger, and thumb.
- Mealtimes/snack times are great opportunities to explore safer small items that the infant can pick up and transfer to their mouth.
- Encourage the infant to actively point and pinch using thumb, index, and middle fingers.
From easier to harder:
- Sensory exploration of toys (e.g., fuzzy/furry blankets, mats on tabletop/floor/wall). Encourage infant to pull at strings/tags.
- Board puzzles with nobs for picking up or toys with small handles with adult stabilizing toys.
- Infant points to pictures in books or pokes at toys.
- Play on a musical keyboard, encourage use of index finger.
- Press buttons on a toy to activate toy with forearm on table.
- Bubbles: point and try to pop with index finger.
- Finger puppets.
- Finger feeding: Place small pieces of food on the food tray and get infant to use thumb and index finger (without middle finger) to self-feed.
- Story books with windows and pulling items, finger isolation to point to certain things or items on the page.
- Push or poke items into an egg carton/towel roll cardboard holder; pulling out pipe cleaners inserted in colander holes (e.g., push and pull straws through holes)
- Squeeze out small sponges with water, play by pinching.
- Small toy syringes, get infant to squeeze out water.
- Pick up cotton balls and paint with them.
- Peel stickers half stuck on tray/table.
- Animal rescue: Use masking tape to secure toys to a surface (flat is easier than vertical). Encourage the infant to use a pinching grasp to peel the tape off and rescue the animal.
- Velcro board: add velcro to smaller items and have the infant pull them off.
Appendices
To date, one evidence-based parent mediated Baby-CIMT home program is divided into three 6-week blocks (Reference to: National Library of Medicine website).
In this program, Baby-CIMT is carried out for 30 minutes/day for 7 days per week, for 6-weeks, followed by a 6-week break, then repeating Baby-CIMT for another 6-weeks. The 30-minute session can be broken up into shorter sessions if the infant is not yet tolerating 30 minutes. During the 6-week break, the infant is given toys that require two hands to play with for the purpose of practicing the helper hand skills learned in the first 6 weeks.
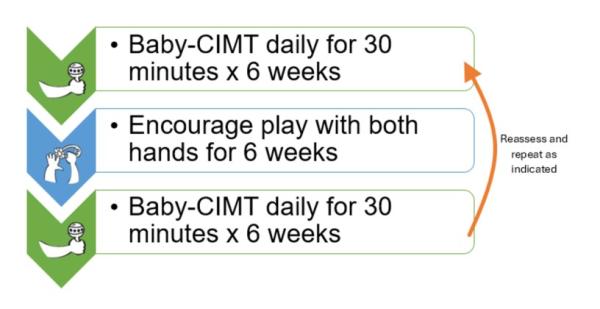
This is only one example of a Baby-CIMT program.The clinical team may recommend a different program frequency from the one above. For example, some infants may tolerate more Baby-CIMT and/or benefit from a greater intensity, others may benefit from a more distributed intensity (e.g., shorter sessions over more weeks), and others may need less intensity but more frequent blocks. At the time of print, evidence shows an effective Baby-CIMT program requires at least 42-hours.
Overall, we want to develop a “just right” Baby-CIMT parent mediated home program that encourages the infant to use their helper hand more overtime.

